Hello friends, followers, visitors, viewers and for today, class members.
We are going to go beyond embossing and create a card using an embossing folder as our guide.
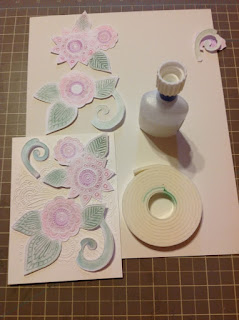
Materials I used
- Darice "henna" embossing folder
- Ranger perfect pearls (if you don't have this, you can use any coloring medium that you have. An example would be Distress inks, Distress Oxide, Pearlescent Chalks, your Copic or Spectrum Noir pens
- Embossing Machine ( I used my Big Shot...you could use the Sizzix Texture Boutique if you have one)
- Scissors, glue, foam tape, exacto knife
 I made this card and posted it a while back. This week I posted it again on another site and received so many questions that I decided to do a tutorial on how I made it. |
| http://lilartsywoman.blogspot.com/2016/06/beyond-embossing.html |
 |
| The finished product from today's tutorial. It will also be entered in WordArtWednesday |
Challenge #274-275 - Anything Goes
 |
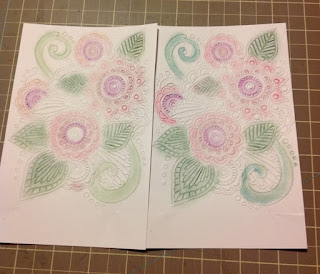
| Another card from the same tutorial using Pebbles Pearlescent Chalks...see you don't have to use Perfect Pearls |
Let's get started:
Step One, we will use whatever paper we want for our project (here I used white the first one I used bronze cardstock).
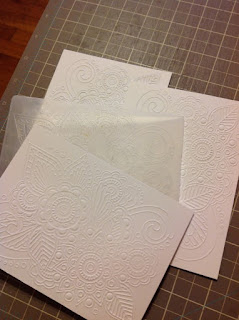
We will cut three or four piece 4.25 by 5.75 ( 4 1/4 by 5 3/4). These pieces will be embossed with the Darice "henna" embossing folder. One piece will be set aside for our base (we will be adhering our pieces to this piece once we finish coloring and fussing cutting out the pieces we want to use.


Step Two:
On the extra pieces, color in the desired pieces that you want to use (it is really up to you).
I used Perfect Pearls to color these pieces (follow the directions for using Perfect Pearls).
Someone wanted to know: "how do you keep the powder from rubbing off?" This is what I did and it worked for me...after coloring, I misted some water in the air and waved my paper through the mist ( you may have to do this several times...trick used by Jennifer McGuire). Please do not mist the paper.
Perfect Pearls can be mixed with water for painting...you may want to try this method but I will suggest using watercolor paper.
Step Three:
Cut out the pieces you have colored.
Step Four:
On the piece you set aside, try placement of your cut pieces on it. Some pieces may have to be cut apart again depending on how you want your card to look and how many layers you want. Use glue for pieces you do not want to be lifted and use foam tape for pieces you want a little lift to.
We are going to build our focal area from bottom to top using either the glue or foam tape.
*Note...if you don't want to have a lot of dimension using the foam tape, then use form paper behind the piece that you want to raise up off your paper (I used foam paper on the brown card..it lifts but not very high).
Step Five:
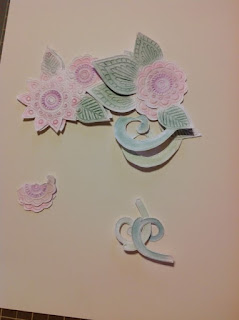
This is really not a step...I'm showing you how I start layering my pieces with the glue and foam tape.
I had to cut the leaves from the flower so they could be applied as the first layer, then the flower.
*Note: the flower has several parts...it is up to you how many parts you want to show. In my examples...I'm showing two + three layers on one card and on the other card three layers.

This is the finished product after layering my pieces.
I added Ranger liquid pearls into the empty circles and on top of the flowers. I layered my top piece to a brownish purple piece (DCWV "the Far East paper stack" ), layered it again to a pink (Heartfelt Creation "Botanic Orchid Collection paper pad") another brownish purple piece before the Neenah white card base.

Thanks for viewing with me today. I hope I gave you more encouragement to try going beyond just embossing a piece of paper.
I invite you to visit with me again and comments are always encouraged.
Sending you a hug and LOVE,
Lois
No comments:
Post a Comment